
How to Grow Garlic in a Pot and Enjoy an Endless Supply 🧄
Welcome, fellow gardening enthusiasts! Today, I’m thrilled to share with you the secrets of growing your own garlic in a pot, ensuring you never have to buy garlic again. Garlic is a staple in many kitchens, revered not just for its robust flavor, but also for its remarkable health benefits. Rich in vitamins A, B, C, and E, along with essential minerals like calcium, potassium, zinc, and selenium, garlic also contains allicin, a powerful natural antibiotic. This guide will walk you through everything you need to know to cultivate garlic at home, providing a perpetual supply for your culinary and health needs.
Ingredients Overview
1. Potting Soil: Use high-quality, well-draining potting soil to ensure healthy growth. Soil rich in organic matter will provide the nutrients garlic needs to thrive.
2. A Head of Garlic: Choose fresh, firm garlic heads from a local market or grocery store. Organic garlic is often recommended as it is less likely to have been treated with chemicals.
3. A Pot: Select a sizable pot with adequate drainage holes to prevent waterlogging. A pot that is at least 12 inches deep and wide is ideal for growing multiple cloves.
Step-by-Step Instructions
Step 1: Prepare Your Pot
- Select a Pot: Choose a large pot, preferably with a diameter of at least 12 inches and good drainage holes. This will provide enough space for multiple garlic cloves to grow.
- Fill with Soil: Fill the pot with high-quality potting soil, leaving about an inch from the top to prevent overflow when watering.
Step 2: Prepare the Garlic Cloves
- Separate the Cloves: Gently separate the cloves from the garlic head, making sure not to damage them. Use only the largest and healthiest cloves for planting.
- Check for Freshness: Ensure the cloves are fresh and free from mold or damage. Fresh cloves will have a better chance of sprouting and growing into healthy plants.
Step 3: Plant the Cloves
- Planting Depth and Spacing: Plant each clove about 2.5 cm (1 inch) deep with the pointed end facing up. Maintain a distance of approximately 10 cm (4 inches) between each clove to allow for proper growth.
- Cover with Soil: Add a thin layer of soil (about 1 cm or 0.4 inches) over the planted cloves, ensuring they are just covered but not buried too deeply.
Step 4: Position and Water
- Sunny Spot: Place the pot in a location that receives plenty of sunlight, ideally 6-8 hours a day. Garlic thrives in sunny conditions.
- Watering: Water the cloves lightly but consistently, keeping the soil slightly moist but not waterlogged. Overwatering can lead to rot, so it’s crucial to find a balance.
Step 5: Monitor Growth
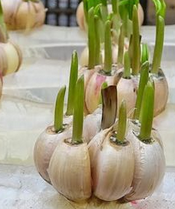
- Watch for Shoots: Over the next few weeks, you’ll see green shoots emerging from the soil. This indicates that your garlic is growing well.
- Remove Blossoms: If any blossoms appear, pinch them off to concentrate the plant’s energy on growing the bulbs, enhancing their flavor and size.
Step 6: Harvesting
- Timing: Garlic is usually ready to harvest when the plant has 5-6 green leaves, and they start to yellow and wither. This typically takes about 8-10 months.
- Harvesting Method: Gently dig up the bulbs, being careful not to damage them. Shake off excess soil and let them dry.
Step 7: Curing
- Drying: Place the harvested garlic in a cool, dry place like a garage or cellar. Let them dry for about a week to cure them, which enhances their storage life.
- Storing: Once dried, store your garlic in a cool, dry place with good air circulation. Avoid plastic bags, which can trap moisture and lead to mold.
Additional Tips for Seamless Gardening
- Planting Time: The best times to plant garlic are in early spring or fall. Fall planting usually yields larger bulbs.
- Edible Green Stems: The green stems of garlic, also known as scapes, are edible and can be used like chives. They add a mild garlic flavor to dishes.
- Regular Check-ins: Regularly check your garlic plants for signs of pests or disease. Early intervention can prevent larger problems.
Frequently Asked Questions (FAQs)
Q1: Can I use any type of garlic for planting?
- A: While you can plant any garlic, using organic garlic is preferable as it is less likely to be treated with chemicals that inhibit growth. Avoid garlic from the supermarket that may have been treated to prevent sprouting.
Q2: How do I know when my garlic is ready to harvest?
- A: Garlic is typically ready to harvest when the lower leaves have turned yellow and started to dry out. This usually happens 8-10 months after planting.
Q3: Can I grow garlic indoors?
- A: Yes, garlic can be grown indoors as long as it gets enough sunlight. Place the pot in a sunny window or use grow lights to ensure it gets sufficient light.
Q4: How often should I water my garlic plants?
- A: Garlic requires consistent moisture, but the soil should not be waterlogged. Water lightly, aiming to keep the soil slightly moist. Reduce watering as the plants mature.
Q5: What should I do if my garlic starts to flower?
- A: If your garlic starts to flower, remove the flowers to ensure that the plant’s energy is focused on bulb growth rather than seed production.
By following these detailed steps and tips, you can enjoy a continuous supply of homegrown garlic, enhancing both your culinary creations and your well-being. Happy gardening, and may your pots be ever bountiful!
This blog post is designed to provide you with all the information and guidance needed to grow garlic at home successfully. Enjoy the process, and reap the rewards of fresh, homegrown garlic!