
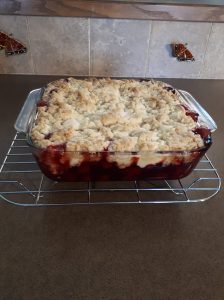
Cherry Cream Cheese Dump Cake
This Cherry Cream Cheese Dump Cake is rich, gooey, buttery, and bursting with sweet cherry flavor. With just a few pantry staples and no mixing bowls, this easy dessert comes together in minutes and bakes into a crowd-pleasing treat that tastes like you worked for hours.
Perfect for holidays, potlucks, or a cozy family dessert night!
Ingredients
-
2 cans (21 oz each) cherry pie filling
-
1 container (8 oz) Philadelphia Whipped Cream Cheese
-
1 box white cake mix
-
1 stick (½ cup) butter, melted
-
Nonstick cooking spray
Instructions
-
Preheat oven to 350°F (175°C).
-
Grease a 9×13-inch baking dish.
-
Spread both cans of cherry pie filling evenly across the bottom.
-
Spoon small dollops of whipped cream cheese all over the cherries.
-
Sprinkle the dry cake mix evenly over the top.
-
Drizzle the melted butter over the cake mix, covering as much of the surface as possible.
-
Bake for 30–40 minutes, until the top is golden and bubbly.
-
Let cool for 10–15 minutes before serving.
Serve warm with whipped cream or vanilla ice cream.
Variations
-
Cherry Cheesecake Version: Use regular cream cheese cut into cubes instead of whipped
-
Chocolate Cherry: Use chocolate cake mix
-
Almond Cherry: Add ½ teaspoon almond extract to the cherry layer
-
Berry Blend: Use one can cherry and one can blueberry
-
Peach Cherry: Use one can peach filling + one can cherry
-
Coconut Cherry: Sprinkle shredded coconut on top before baking
-
Nutty Crunch: Add sliced almonds or chopped pecans
-
Holiday Style: Add cinnamon and nutmeg
-
Gluten-Free: Use gluten-free cake mix
-
Low-Sugar: Use sugar-free pie filling and reduced-sugar cake mix
20 Helpful Tips
-
Spread cherries evenly so every bite has fruit.
-
Small cream cheese dollops melt best.
-
Don’t mix layers — dump and bake!
-
Drizzle butter slowly to cover more surface.
-
Use foil if the top browns too fast.
-
Let cool before cutting for clean slices.
-
Use glass or ceramic baking dishes for best results.
-
Serve warm for gooey texture.
-
Add extra butter for richer flavor.
-
Use room-temp cream cheese for better melting.
-
Spray dish well to avoid sticking.
-
Try with pineapple filling for tropical flavor.
-
Add vanilla ice cream for serving.
-
This dessert thickens as it cools.
-
Store leftovers covered in the fridge.
-
Reheat in microwave or oven.
-
Sprinkle sugar on top for crispness.
-
Add oats for crumble texture.
-
Double recipe for a crowd.
-
Great for potlucks and holidays.
20 Frequently Asked Questions
1. Can I use regular cream cheese?
Yes, just cut it into small cubes.
2. Do I have to melt the butter?
Yes, it helps coat the cake mix evenly.
3. Can I use yellow cake mix?
Yes, it will taste just as good.
4. Can I use homemade pie filling?
Absolutely!
5. Does this need to be refrigerated?
Yes, after it cools.
6. Can I freeze it?
Yes, freeze up to 2 months.
7. Can I use less butter?
Yes, but the topping may be drier.
8. Can I make this in a crockpot?
Yes, cook on HIGH for 2–3 hours.
9. Why is my topping powdery?
It needs more butter.
10. Can I double it?
Yes, use a large pan.
11. Can I add nuts?
Definitely!
12. Can I use strawberry filling?
Yes, it works great.
13. Can I make it dairy-free?
Use dairy-free cream cheese and butter.
14. Can I serve it cold?
Yes, it’s delicious chilled.
15. Can I use fresh cherries?
Yes, cook them first with sugar.
16. Can I use cupcake liners?
Better baked in a pan.
17. Is it very sweet?
Yes — it’s a dessert!
18. Can I reduce sugar?
Use sugar-free filling.
19. Can I make it ahead?
Yes, up to 2 days.
20. What pairs best with it?
Vanilla ice cream or whipped cream.