Frozen Pickle Juice Pops
Ingredients:
- Pickle juice (from your favorite jar of pickles)
Equipment:
- Tiny plastic dishes or popsicle molds
- Popsicle sticks or plastic spoons
Instructions:
- Prepare the Pickle Juice: Pour the pickle juice from your favorite jar of pickles into a measuring cup or small pitcher. Ensure you have enough to fill your chosen popsicle molds.
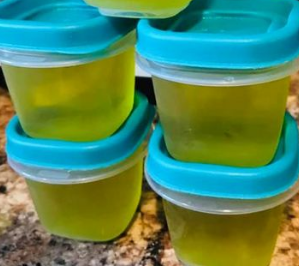
- Fill the Molds: Pour the pickle juice into the tiny plastic dishes or popsicle molds, leaving a little space at the top for expansion when freezing.
- Insert Popsicle Sticks: If using tiny plastic dishes, insert a popsicle stick or plastic spoon into each one. If using popsicle molds with built-in sticks, skip this step.
- Freeze: Place the filled molds or dishes in the freezer and let them freeze for several hours or until solid. It’s best to freeze them overnight for optimal results.
- Enjoy: Once frozen solid, remove the pickle juice pops from the molds or dishes. If using tiny plastic dishes, you may need to run them under warm water for a few seconds to loosen the pops. Serve immediately and enjoy the refreshing taste of frozen pickle juice!
Notes:
- Frozen pickle juice pops are a great way to stay cool and hydrated during long days at the ball field or during any outdoor activity.
- These pops are not only refreshing but also provide electrolytes, making them an excellent choice for combating cramps and dehydration.
- Experiment with different types of pickle juice, such as dill or bread and butter, to find your favorite flavor combination.
- Remember to keep extras in the freezer for future games or whenever you need a quick and refreshing treat
Tips for Making Frozen Pickle Juice Pops:
- Choose Quality Pickle Juice: Select pickle juice from a jar of pickles that you enjoy. Whether it’s dill, bread and butter, or another variety, the flavor of the pickle juice will directly impact the taste of your popsicles.
- Measure Properly: Use a measuring cup or small pitcher to pour the pickle juice into your molds. This ensures you have the right amount of liquid to fill each mold without overfilling or running short.
- Leave Room for Expansion: When pouring the pickle juice into the molds, leave a small space at the top to allow for expansion as the liquid freezes. This helps prevent overflow and ensures the popsicles are easy to remove from the molds once frozen.
- Secure Popsicle Sticks: If using tiny plastic dishes, insert popsicle sticks or plastic spoons into each one before freezing. Make sure the sticks are centered to ensure they freeze in place. For molds with built-in sticks, simply fill and freeze.
- Optimal Freezing Time: For best results, freeze the popsicles for several hours or overnight until they are completely solid. This ensures they hold their shape and texture when removed from the molds.
- Loosen Popsicles Before Serving: If using tiny plastic dishes, run them under warm water for a few seconds to loosen the popsicles before removing them. This makes it easier to extract the popsicles without damaging them.
- Experiment with Flavors: Don’t hesitate to experiment with different types of pickle juice to find your favorite flavor combination. You can try dill, bread and butter, spicy, or any other variety that catches your interest.
- Stay Hydrated: Enjoy these frozen pickle juice pops as a refreshing and hydrating treat, especially during outdoor activities or long days at the ball field. The electrolytes in the pickle juice can help replenish fluids lost through sweating and combat dehydration.
- Keep Extras on Hand: Make a batch of these popsicles and keep extras in the freezer for future enjoyment. They’re perfect for quick and refreshing snacks whenever you need a cool treat.